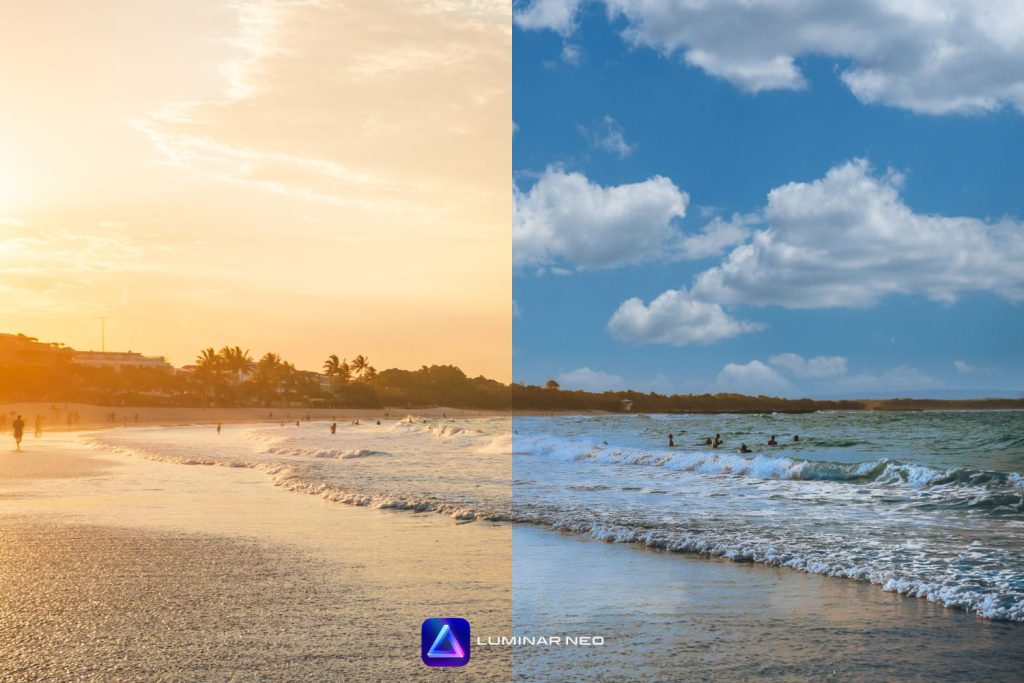
Today, we’ll explore how to harness the power of AI sky replacement in Luminar NEO. It offers a quick and effective solution, saving you from laborious hours in Photoshop and delivering stunning results with just a few clicks.
Whether you’re capturing landscapes, cityscapes, or even street scenes, the sky plays a crucial role in the overall mood of your image. Its unpredictability, though, can sometimes work against us. The weather might not cooperate, or the lighting conditions may be less than ideal. In such cases, replacing the sky in your image can work wonders.
We’ve previously delved into a full Luminar review, but today, we’ll focus on one of its most impressive features: AI sky replacement.
Replacing the sky in a photograph is no walk in the park. You need to consider numerous variables, understand the nuances of masking in post-processing software, and ensure the overall light conditions and the final result look realistic. If you’re not familiar with advanced editing tools, this can mean spending hours glued to your computer screen. But it doesn’t have to be this way.
Enter Luminar NEO, a photo editing software developed by Skylum that uses Artificial Intelligence (AI) to do the heavy lifting for you. It offers a host of AI-powered features, but today, we’ll be focusing on how you can enhance your landscape photography with the sky replacement tool in Luminar NEO.
AI Sky Replacement Tool

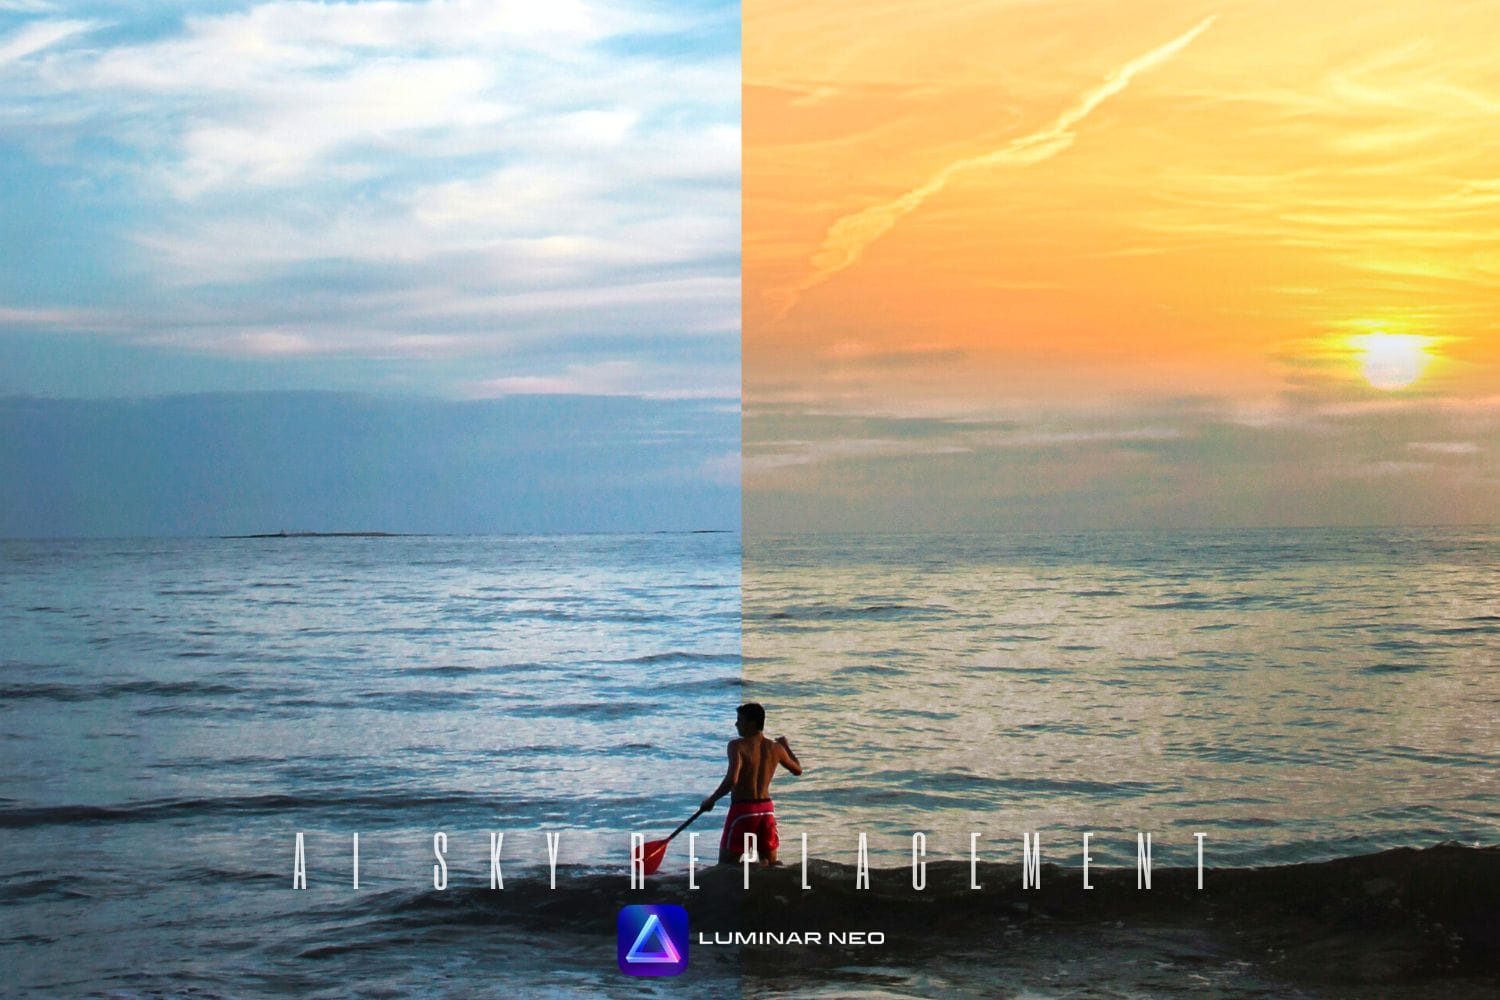
The AI Sky Replacement tool in Luminar NEO is a game-changer. It analyzes your image, determines where the sky begins and ends, and seamlessly replaces it. It’s designed to work with flat or blown-out skies, but with a little tweaking of the sliders, it can work with almost any sky. It replaces the sky automatically to create a realistic look, adding a new dimension to your images. If you feel your image could benefit from a more dramatic sky, this tool is worth exploring.
Using the sky replacement tool in Luminar NEO is a breeze. First, download a copy of the Luminar NEO software from Skylum’s website. They offer a fully functioning 7-day trial for both Windows and Mac. Once you’ve got the software, it’s as simple as importing an image, clicking a few buttons, and adjusting some sliders.
Using Luminar NEO for Replacing Skies

Even if you’re new to Luminar NEO, you’ll quickly realize that the software offers much more than just sky replacement. It provides a plethora of tools and controls for fine-tuning your images, allowing you to correct exposure, adjust colors, and refine details — much like Adobe Lightroom.
If you prefer to do your initial editing in Photoshop or Lightroom, you can then launch Luminar NEO from within those programs for the sole purpose of sky replacement. Alternatively, you can manually launch Luminar NEO, import your image, and start playing with the sky.
Here’s a step-by-step guide on how you can use Luminar NEO to take your landscape photos to the next level with some gorgeous skies:
1. Open your image in Luminar NEO and navigate to the Creative panel on the right side of the window. At the top of the panel, you’ll find the AI Sky Replacement tool.
2. Click on the AI Sky Replacement section to reveal a dropdown list of preloaded skies. You’ll also see sliders to fine-tune the results.
3. To replace the sky, click on the Sky Selection dropdown list and select the sky that best fits your scene. Click on any of the options to see an instant transformation of your image. If you have a particular sky image you’d like to use, you can upload it as a custom sky image.
What’s fascinating is that the AI doesn’t just replace the sky; it also subtly adjusts the lighting and color of the foreground and other areas of the image to ensure a natural and realistic result. Skylum has thoughtfully included this feature to enhance the overall effect.
You can check out our full review of the luminar sky replacement here.
Fine Tuning the Replaced Sky in Luminar NEO

The AI Sky Replacement tool generally does a commendable job. However, if your image is a bit tricky or if you want to delve deeper into the software’s advanced features, Luminar NEO has you covered.
You can adjust the Horizon Blending to soften the line where the sky meets the landscape, ensuring a smooth transition in lighting. The Horizon Positioning tool allows you to shift the horizon upwards or downwards, useful for changing the position of the sun.
The software also lets you balance the lighting between the foreground and the sky with the Relight Scene feature, ensuring a more natural look. With the Sky Global adjustment, you can control how the sky texture blends into the scene.
Luminar NEO also offers advanced settings like Close Gaps for filling small openings in the image, Sky Local to control the replacement of original clouds, Sky Defocus to blur the sky for shallow depth of field effects, and Flip Sky to invert the sky if the shadow direction doesn’t match.
You can also add Atmospheric Haze for a touch of drama, match the sky’s color temperature with the landscape using Sky Temperature, and control the sky’s exposure with the Sky Exposure tool.
Final Verdict on Luminar NEO Sky Replacement

The sky replacement tool in Luminar NEO is a marvel. It saves me from spending hours in Photoshop and delivers better results in a fraction of the time. If you’re a landscape photographer, you’ll see the value in this feature. And even if you believe there’s room for improvement, the software offers numerous controls to fine-tune the final result. Skylum has done an excellent job with this iteration of the software.
Whether you’re a landscape photographer, fine-art photographer, or creative artist, this feature can add a new dimension to your work. And even if you’re not usually into this kind of editing, it’s worth giving it a go — you might be pleasantly surprised with what Luminar NEO can do.